New Age Auto Painting Blog · September 2, 2026
Before After Collision Repair Examples That Matter
See before after collision repair examples that show what skilled bodywork and paint repair can address for Lakeland drivers after an accident clearly.
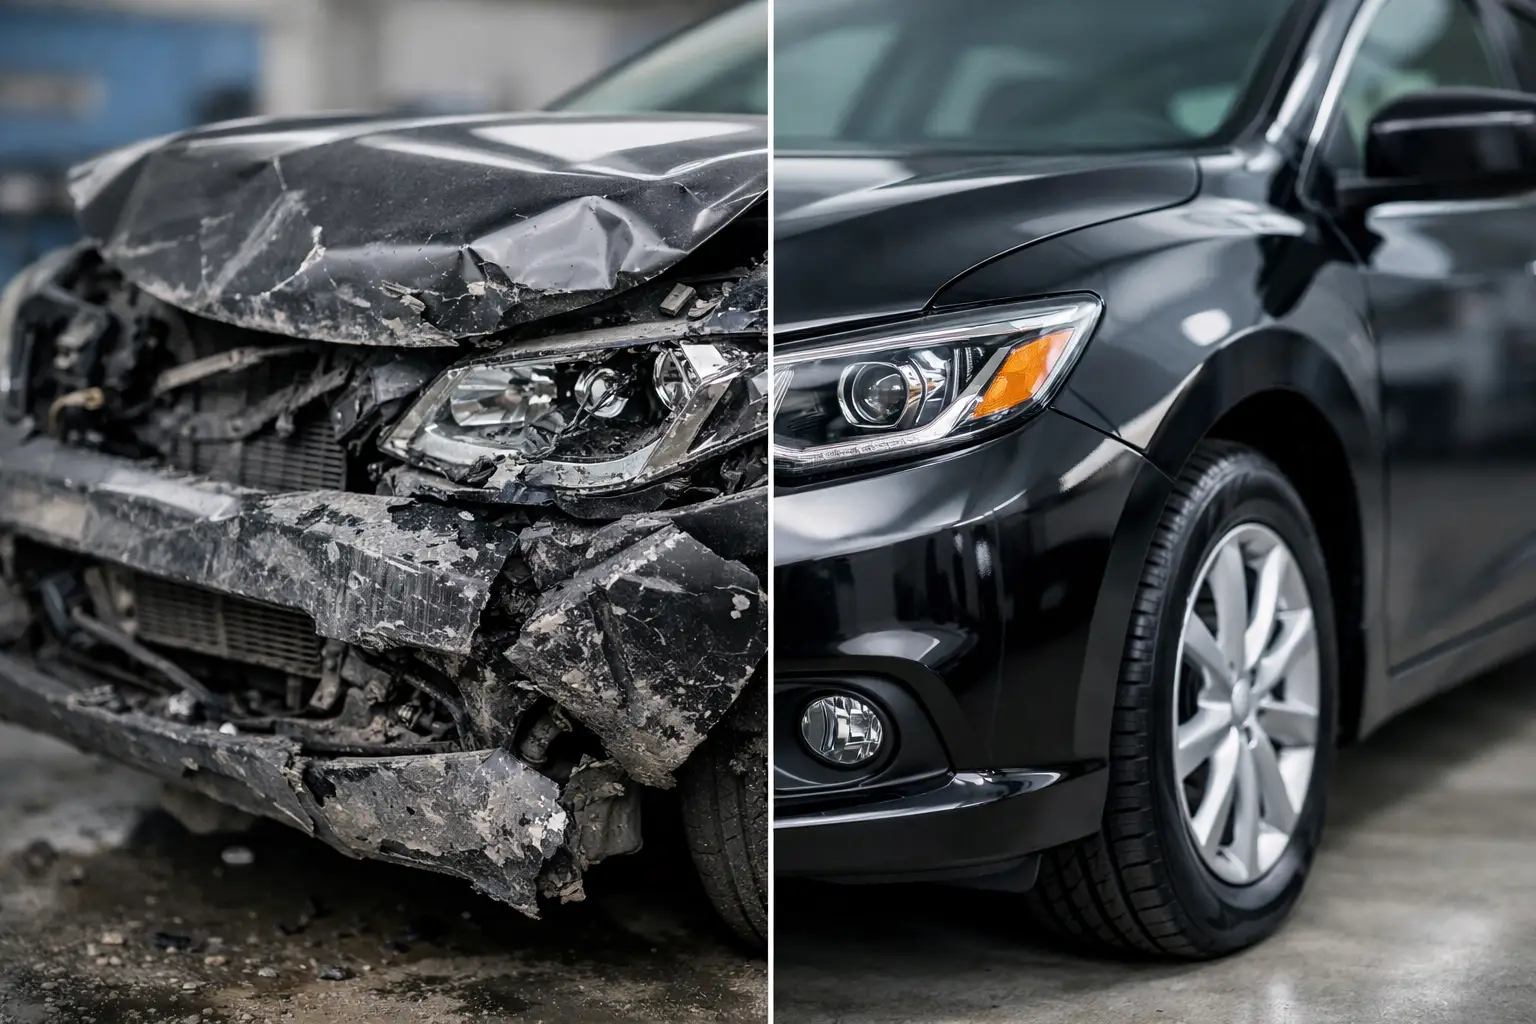
A damaged bumper can look like a simple cosmetic problem until the gaps around the headlights no longer line up, the paint is cracked, or a mounting point behind the cover has shifted. Before after collision repair examples help show the difference between covering damage and properly restoring the vehicle. For Lakeland drivers, the best result is not just a cleaner-looking car. It is body panels that fit correctly, paint that blends naturally, and repairs completed with the vehicle’s condition in mind.
What Before After Collision Repair Examples Should Show
The most useful repair examples do more than show a dented vehicle next to a shiny finished photo. They reveal the condition of the damage before work begins and the level of detail required to restore it. A quality repair may involve dent removal, panel alignment, bumper repair, replacement parts, corrosion prevention, surface preparation, and professional refinishing.
The “after” condition should look consistent from more than one angle. Body lines should flow correctly. Doors, hoods, trunk lids, and bumpers should have even panel gaps. The repaired area should not stand out because of a mismatch in color, texture, or gloss. On late-model vehicles, the finished work also needs to account for sensors, cameras, lights, and other components located in or behind exterior panels.
Photos are useful, but they do not always show everything that matters. Damage behind a bumper cover or beneath a crumpled quarter panel can affect brackets, reinforcements, liners, and mounting areas that are not visible in a final image. That is why a professional inspection is the starting point for any accurate repair plan.
Example 1: Rear Bumper Scuff and Corner Damage
A common minor collision example starts with a low-speed impact in a parking lot. The rear bumper may have deep paint scuffs, a crease near one corner, and a loose edge where the bumper meets the quarter panel. At first glance, it may seem like a touch-up paint job would solve the issue.
Before repair, the shop checks whether the bumper cover is only scratched or whether it has torn tabs, cracks, or distortion. A bumper that is pushed out of position may need its retainers, brackets, or underlying components inspected before refinishing begins. Simply painting over a misaligned bumper leaves the vehicle looking unfinished.
After repair, the goal is a smooth bumper surface, secure fitment at the quarter panel and taillight, and color that blends with the surrounding finish. Depending on the damage, the bumper may be repaired and painted or replaced if the material and mounting points cannot be reliably restored. This is a good example of why the least expensive-looking option is not always the best long-term repair.
Example 2: Front-End Collision With Hood and Fender Damage
A front-end impact often creates more visible damage: a bent hood edge, cracked grille, damaged headlight, and a fender that no longer lines up with the door. In before after collision repair examples, this type of repair can look dramatic because the finished vehicle regains its original shape and clean front-end appearance.
The work behind that result is more involved than replacing exterior parts. The repair process begins with an assessment of the hood, fender, bumper, headlight mounts, radiator support area, and related components. The extent of the impact determines whether panels can be repaired or should be replaced. A hood with a sharp buckle near a reinforced area, for example, may not be a good candidate for repair.
After parts are properly aligned, surface preparation and paintwork bring the front end back together visually. Color matching is especially important on a hood and fender because these panels sit next to large painted areas that make differences easier to see in Florida sunlight. A professional finish accounts for color, metallic orientation, gloss level, and the transition between repaired and adjacent panels.
Example 3: Side-Swipe Damage Along Doors and Quarter Panels
A side-swipe can leave a long trail of damage across two or three panels. The vehicle may still drive normally, but the doors can have dents, paint transfer, sharp creases, and damaged moldings. In some cases, a door edge may catch or the panel gap may become uneven.
Before repair, the focus is on identifying every affected panel rather than treating each dent separately. Paint transfer may be removable, but a crease that stretched the metal needs body repair. If a rear door and quarter panel are both damaged, the repair must preserve the body line that runs through them. That line is one of the first details people notice when a repair is not completed correctly.
After repair, the side of the vehicle should look straight under direct light and at an angle. The doors should open and close normally, trim should sit securely, and the refinished sections should blend with nearby panels. Sometimes the repair requires refinishing more than one panel to achieve a consistent color transition. That can add time and cost, but it often produces a more natural result than trying to paint only a small isolated area.
Example 4: Dent, Scratch, and Faded Paint on an Older Vehicle
Not every before-and-after transformation follows an accident. Older vehicles often come in with parking-lot dents, peeling clear coat, oxidation, scratches, and previous repairs that no longer match. These jobs require a different approach because the visible damage may be spread across several areas rather than concentrated at one impact point.
Before work begins, the condition of the existing paint matters. Faded or failing clear coat cannot be corrected by polishing alone. Deep scratches may extend through the color layer, while small dents may require metal or plastic repair before paint can be applied. If an older panel has rust, the source of the corrosion needs attention before refinishing. Paint over untreated rust will not provide a lasting solution.
After professional bodywork and painting, an older vehicle can look significantly cleaner and more presentable. The realistic expectation is restoration of the affected area based on the vehicle’s overall condition and the selected repair scope. A partial repair may be the right choice for a dependable daily driver, while a more extensive paint project may make sense for an owner planning to keep the vehicle for years.
The Details That Separate a Good Repair From a Quick Fix
The strongest collision repair results come from correct preparation. Paint is only as good as the surface underneath it. A panel with poor filler work, insufficient sanding, or contamination can show waves, edge lines, peeling, or texture problems after the vehicle leaves the shop.
Fit and finish matter just as much. A replacement bumper or fender needs to be checked for alignment before paint and final assembly. Headlights should sit evenly. Panel gaps should be consistent. Moldings, emblems, clips, and liners should be reinstalled securely. These details affect appearance, but they also help protect the vehicle from water intrusion, vibration, and premature wear.
Color matching has its own trade-offs. Factory paint changes over time because of sun exposure, weather, and regular washing. A paint code provides a starting point, not always a perfect answer. A skilled refinishing process may require tinting the color and blending into adjacent panels so the repair does not look like a separate patch. This is particularly important with pearl, metallic, tri-coat, and lighter colors.
What to Ask When Reviewing Repair Results
When choosing a collision repair shop, look beyond a single polished “after” image. Ask whether the estimate includes damage inspection, whether repaired parts will be restored or replaced, and how paint matching will be handled. If your vehicle has parking sensors, cameras, or driver-assistance features, ask how those components will be addressed during reassembly.
It also helps to discuss the repair timeline realistically. Parts availability, insurance approval, hidden damage, and paint curing requirements can affect completion time. A shop that explains these variables clearly is helping you make an informed decision rather than promising an unrealistic turnaround.
New Age Auto Painting serves Lakeland vehicle owners who need collision bodywork and professional paint restoration handled in one place. Whether the damage is a scraped bumper or a more involved panel repair, the repair plan should match the vehicle, the damage, and the standard you expect when you get back behind the wheel.
A finished vehicle should not make you wonder where the damage used to be. It should feel properly put back together, look clean in natural light, and give you confidence every time you walk up to it.