New Age Auto Painting Blog · July 18, 2026
How to Prepare a Car for Repaint: 7 Key Steps
Learn how to prepare car for repaint with practical cleaning, repair, sanding, and inspection steps that help achieve a durable, professional paint finish.
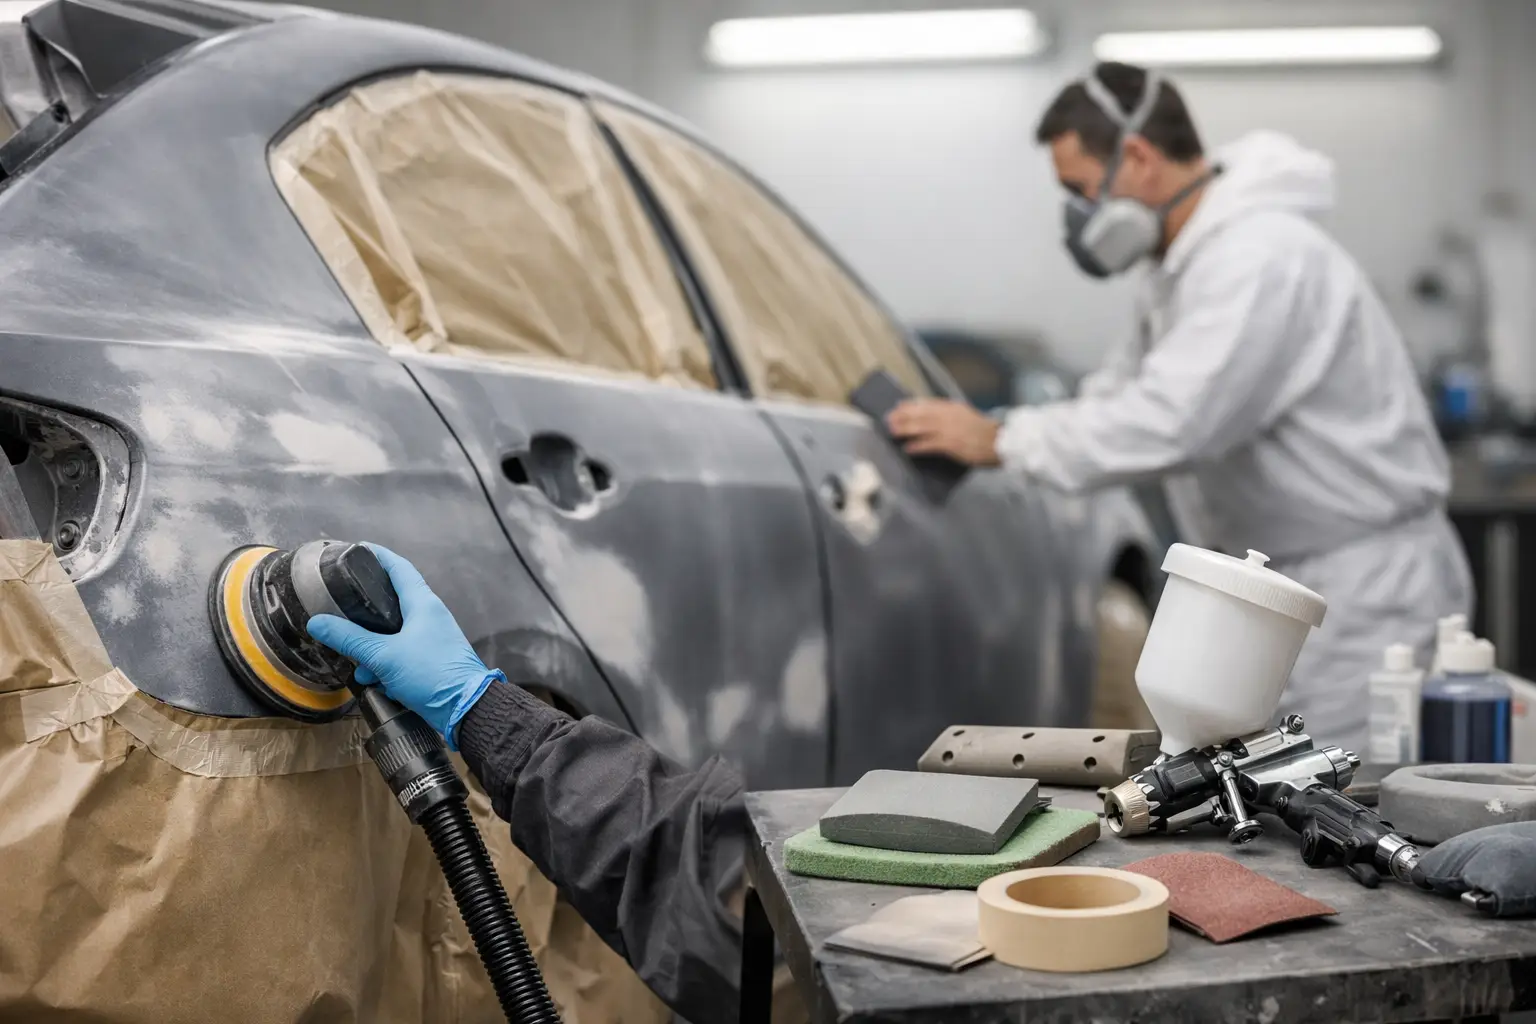
A new coat of paint can make a vehicle look years newer, but paint only performs as well as the surface beneath it. Knowing how to prepare car for repaint helps prevent common problems such as peeling, visible sanding scratches, uneven color, and rust returning beneath the finish. For Lakeland drivers, proper preparation also matters because Florida heat, rain, humidity, and sun can expose weaknesses in a rushed repair quickly.
Repainting a car is not simply a matter of spraying color over faded or damaged paint. The vehicle must be cleaned, inspected, repaired, sanded, and protected before refinishing begins. Some small cosmetic work can be handled at home, but collision damage, corrosion, panel alignment issues, and complete repaints are best evaluated by an experienced auto body and paint shop.
How to Prepare a Car for Repaint Properly
Preparation begins with an honest assessment of the vehicle. A scratch that appears minor may have damaged the clear coat, color coat, primer, or metal underneath. A dent can leave stretched metal that needs more than filler. If prior paint is peeling, the problem may be poor adhesion below the visible surface, not the color itself.
A professional inspection identifies what needs to be repaired before paint is applied. This is especially valuable after an accident, when bumper covers, fenders, doors, and quarter panels may look acceptable from a distance but have cracks, distortions, or alignment concerns. Repairing those issues first helps the final finish look right and allows body panels, moldings, lights, and gaps to fit correctly.
1. Wash Away Road Film, Wax, and Contaminants
Start with a complete exterior wash using automotive soap and clean water. Remove dirt from panel edges, wheel openings, rocker panels, door jambs, and other areas where grime can transfer back onto the work surface. Tar, bug residue, tree sap, and road film should be removed with products intended for automotive finishes.
Washing alone does not remove every contaminant. Wax, silicone-based dressings, polishing residue, and grease can interfere with adhesion and cause fisheyes or other defects in fresh paint. A wax-and-grease remover is commonly used before sanding and again before refinishing. Use clean microfiber towels and replace them often rather than wiping contamination from one panel to another.
Avoid applying wax, detail sprays, tire shine, or protectants shortly before repainting. Silicone products can travel through the air and settle on adjacent panels, creating paint problems that take time to correct.
2. Inspect the Existing Paint and Metal
Once the vehicle is clean, inspect it in good light. Look for chipped paint, bubbling, cracking, previous repair lines, rust, dents, scratches, and clear coat failure. Run a clean hand lightly over the panel. Raised edges around a chip, a rough repair area, or a ripple near a dent can all indicate work that needs attention before painting.
The condition of the existing finish determines how much sanding and repair work is needed. Sound factory paint may be sanded and used as a stable base for refinishing. Peeling clear coat, failing aftermarket paint, or corrosion usually requires more aggressive removal. There is no single sanding approach that fits every vehicle.
Rust requires particular attention. Surface rust may be removed and treated if caught early, but rust-through, weakened metal, or corrosion around seams often calls for metal repair or panel replacement. Painting over rust may improve appearance briefly, but it will not stop the corrosion from spreading.
3. Complete Body Repairs Before Primer
Dents, creases, holes, and damaged plastic must be repaired before the vehicle is primed or painted. On metal panels, this can involve pulling dents, straightening the panel, and applying body filler only where needed to refine the surface. On bumper covers and other plastic parts, repairs may require plastic welding, flexible repair materials, or replacement depending on the damage.
Filler should never be used as a shortcut for major damage or badly distorted metal. Excessive filler can crack, shrink, or reveal an uneven repair later. A quality repair restores the panel shape first, then uses finishing material sparingly to create a smooth surface.
This step also includes checking panel alignment. A freshly painted fender will still look wrong if the gap at the hood or door is uneven. After collision damage, proper fitment is part of a complete repair, not an optional detail.
4. Sand in Stages, Not All at Once
Sanding creates the surface profile that allows primer and paint to bond. It also feathers the edge between damaged and undamaged paint so the repair does not show through the final finish. The correct grit depends on the material being sanded and the next product being applied.
Damaged areas may need coarser abrasives to remove failed paint, corrosion, or old repair material. Refining the repair requires progressively finer grits. Before color application, the surface must be uniformly smooth and free of deep scratches. Scratches that seem invisible before painting can become obvious once sunlight hits a glossy finish.
Use sanding blocks where possible on flat areas. Sanding only with fingers can create grooves and uneven waves in body filler or primer. Curved panels, edges, and body lines need extra care because sanding through too aggressively can expose metal or damage adjacent paint.
Dry sanding produces dust, while wet sanding can help create a very fine finish in the proper stage of the process. Both methods have a place, but they require a clean work area and careful control. Dust left in seams, trim openings, or panel gaps can contaminate later paint work.
5. Apply the Right Primer for the Repair
Primer is more than a gray layer before paint. Different primers serve different purposes. Bare metal may need an epoxy primer for corrosion protection. Repaired areas often need a high-build primer to level minor sanding marks and small surface imperfections. Plastic components may require adhesion-promoting products designed for flexible parts.
After primer is applied and cured, it is sanded again to create a smooth base for the color coat. Guide coating can help reveal low spots, pinholes, and sanding scratches that are difficult to see otherwise. If flaws appear at this stage, they should be corrected now rather than covered with color.
Skipping primer or applying incompatible products can lead to adhesion failures, swelling, solvent reactions, or visible repair edges. Automotive coatings are systems, and the products need to work together from the substrate through the clear coat.
6. Remove or Mask Trim, Glass, and Adjacent Panels
A clean repaint depends on controlling where the coating goes. Whenever practical, parts such as lights, emblems, handles, mirrors, moldings, and weatherstrips should be removed rather than painted around. This provides cleaner edges and reduces the risk of overspray on trim or glass.
Some parts cannot be removed without adding unnecessary labor or creating a risk of damage. In those cases, professional-grade masking materials and techniques protect surrounding surfaces. Newspaper, household tape, and loosely applied plastic are poor substitutes. They can allow paint bleed-through, lift during spraying, or leave adhesive residue behind.
For partial repairs, surrounding panels may need blending so the new color transitions naturally into the original finish. Metallic and pearl colors are particularly sensitive to spray angle, coverage, and blend technique. Even with the correct paint formula, a panel-only repair may look different if it is not blended properly.
7. Final Clean, Final Check, Then Paint
Before color is sprayed, the repair area should be inspected one more time under bright lighting. Check for pinholes, sanding marks, dust, exposed edges, incomplete masking, and uneven primer. The surface is then cleaned with the appropriate prep product and wiped with a tack cloth to remove fine dust.
The paint environment matters as much as the panel preparation. Florida humidity, airborne debris, insects, and changing temperatures can make open-driveway painting unpredictable. Professional spray booths provide controlled airflow, filtration, lighting, and temperature conditions that help achieve consistent color application and a smoother clear coat.
A repaint also requires proper curing time. The vehicle may look finished when it leaves the booth, but fresh paint continues to cure. Follow the shop's guidance on washing, waxing, and exposure to harsh chemicals during the first weeks after refinishing.
When Professional Repaint Preparation Makes Sense
Small touch-ups may be reasonable for a minor chip in an inconspicuous area. Full-panel repainting, clear coat failure, rust repair, deep dents, bumper damage, and accident-related body work require more equipment and skill than most vehicle owners have at home. The cost of correcting a failed DIY paint job can exceed the cost of preparing it properly from the start.
New Age Auto Painting serves Lakeland-area drivers who need body repair and refinishing handled together. That matters when a repaint is connected to collision damage, a cracked bumper, a dented panel, or paint deterioration that extends beyond the visible surface.
Before scheduling paint work, remove personal belongings from the vehicle, point out every area of concern, and ask how the repair will be blended with adjacent panels. Clear communication at the estimate stage gives the technician the information needed to prepare the vehicle for a finish that looks clean, lasts longer, and suits the condition of the car.